Remove yellow background in Google Adsense Responsive Ads

If you have implemented the responsive Google Adsense code into your website or blog, you may notice that some ad formats introduces an unwanted yellow background to fill the area that is not covered by the ad.

Refer to the example on the right. The ad format is smaller than the width of my main blog column and Google decided to just fill it in with a strange yellow fill. Is there a way to get rid of it? Yes! And thankfully, WordPress made it really easy for you to do it by simply inserting a custom piece of CSS via the WordPress interface!

The first thing you’ll have to do is to log in to your wordpress. Mine is a self hosted WordPress instance but it shouldn’t differ too much. Once you are logged in, you should see the usual administrative black bar on top of your site. Click on “Customize”.

A sidebar will now appear. Somewhere near the bottom, there will be a menu item called “Additional CSS”. Clicking on that will produce a large edit box for you to insert custom CSS code. Paste the following code into it:

ins.adsbygoogle { background: transparent !important; }

The “!important” syntax tells the site to override the original CSS by Google. This will make the yellow background disappear. Good luck!

Oh, what if you are not using WordPress? Simply insert this into your html page’s header within <style> tags.

How to start an Online Store in Singapore

This is not meant to be a full tutorial but I aim to give you a general sense of what to expect. Some of you will ask me why bother creating your own Online Store when there are so many Online marketplaces in Singapore such as Lazada, Qoo10, Shopee, Carousell, etc. Well, there are several reasons:

  1. Unfair competition. On a marketplace site, you tend to have to fight with competitors trying to price you out. They could be selling counterfeit stuff or parallel import stuff that is not exactly the same as what you sell and they “won” by simply being cheaper.
  2. Commission and fees. Apart from Carousell and Shopee, most marketplace platforms charge you commission and/or fees ranging from 7% to 13%. Some platforms like Lazada will even penalise you with fines if you did not manage to ship out your goods within 24 hours from the time of order. Don’t get me wrong. I believe in shipping orders out at the earliest opportunity. However, we are adults and we should be able to be responsible for our own customers’ satisfaction.
  3. You should not build your ship at someone else’s port. You are at the mercy of the marketplace platform’s policies when you use their services. Should there be a day where the marketplace decide to shut down your shop due to policy changes or disagreement, the following you have built on that marketplace will be lost forever.

So it should now be clear that building your own online store is the way to go. You must be wondering what kind of effort it takes right? Generally, there are two ways you can “own” an Online Store.

  1. Use an e-commerce provider like Shopify. I used Shopify for almost 2 years. The experience was great because you pay a monthly fee and they take care of everything like site security, provides you with a idiot-proof interface for you to upload your products, choose themes, etc – very much like WordPress. You can register a domain, like my Tupperware Online Store – http://tup.sg, which is my unique online identity. Although you will still be at their mercy when it comes to policies and stuff, at least you can migrate to another service together with your domain and keep your traffic and branding. What you need to do:
    • Sign up for Shopify
    • Register a domain (The cost will depend on the domain type and registrar you use. Typically ranges from $18 per year to $50 per year)
    • Point the domain to Shopify based on their instructions
    • Choose your theme, set up shipping options, set up payment gateway(s), upload your products, start selling!
  2. Subscribe to your own web hosting account and do everything on your own. This is slightly more advanced but most of the difficult steps are one-time setups which you can engage people like me to help. If you want to try it yourself, here’s a glimpse of what you need to do:
    • Sign up for a web hosting account (USD$3.95 per month)
    • Register a domain (The cost will depend on the domain type and registrar you use. Typically ranges from $18 per year to $50 per year)
    • Point the domain to your host
    • Set up SSL using Let’s Encrypt (Free)
    • Install Magento / WordPress with Woocommerce / Prestashop / Opencart / osCommerce / simpleCart, etc (I suggest WordPress with Woocommerce)
    • Choose your theme, set up shipping options, set up payment gateway(s), upload your products, start selling!

As you may have noticed, doing it on your own with just a USD$3.95 web hosting account is just slightly more troublesome at first. Once you get past the setup, you will never need to pay anyone commission fees, be subjected to ridiculous policies and be locked-in to a particular service provider.

If you need help setting up an Online Store, reach out to me at howard@hj.sg

Recording IP Camera Footages onto NAS or local storage

In my previous post, I shared about my overhaul of IP Cameras in my home. I ditched the 3 cheap D-Link DCS-930L and went for 2  D-Link DCS-5222L IP Cameras. One great feature of this camera is the ability to do RTSP streams. Cheaper IP Cameras usually stream in Motion-JPEG format which I personally find the quality crappy and may not have the audio stream available.

After a few days of research, I concluded that I need to get a camera that streams H.264 via RTSP so that I can capture them natively as mp4 files. D-Link DCS-5222L does that and the price was pretty reasonable for its RTSP support, 720p resolution, PTZ feature and good viewing angle. The hardest thing to do is to choose software that will:

  • Stream from the cameras via command line
  • Dump the video stream as H.264 Mp4 files
  • Save the audio stream in the same file container
  • Segment the footages at my chosen interval with appropriate file naming
  • Reasonably crash-resilient (I’ll explain why later)

I’ve tried many off-the-shelf products and the best one out there appears to be Webcam 7 Pro. It is reasonably stable but captures mainly MJPEG streams only without audio. It does a good job segmenting files and you can even make it auto delete footages that are X days old. Enough of this lest I sound like I’m promoting the software.

I found that VLC is a good candidate as it has robust command line features and can be used to relay a media stream as a fresh broadcast or dump a stream to file with real-time transcoding i.e. you can transcode a H.264 stream into a mpeg file for storage (but you don’t want to do that of course because mpeg files are larger). The problem with VLC that I face is that it crashes easily and that seems to be a bug which caused a stream to be decoded to some raw format causing my disk space to fill up overnight. In the end, I use VLC as a monitoring tool as I can easily launch the RTSP stream by passing the IP Camera URL, port, credentials and the fullscreen parameters via command line.

Here’s how I did it for my camera:

vlc rtsp://admin:[password]@[ip address]:[port]/live1.sdp –fullscreen

Remember to replace [password], [ip address] and [port] with your own values.

Moving on to the next candidate, FFmpeg. 

FFmpeg has been around for many years and many video conversion / broadcasting software including VLC make use of components from FFmpeg! As mentioned above, I needed something that can save both video and audio streams, segment files (so that you don’t get a huge 100GB file after a few weeks) and be able to use timestamps as the filename.

After tinkering for a day or two, I decided that this will work for me:

start “Door Cam” “ffmpeg.exe” -i rtsp://admin:[password]@[ip address]/live1.sdp -c copy -map 0 -f segment -segment_atclocktime 1 -strftime 1 -segment_time 1800 -segment_format mp4 -vcodec copy -acodec aac -strict experimental -ab 64k “.\Recordings\DoorCam-%%Y-%%m-%%d_%%H%%M.mp4”

The above command (yes I know it probably contain redundant flags because I whippped this up with much trial and error) will:

  • start reading the video and audio stream as defined in the SDP file of my D-Link DCS-5222L
  • copy the video stream “as-is” and convert the audio (from PCM mu-law) to AAC @ 64Kbps and mux them into a mp4 container
  • segment the files (chop up the files every 1800 seconds (30 minutes)
  • synchronise the next segment on the clock (i.e. 12:30pm, 1pm, 1:30pm, etc)
  • Give each segment a meaningful filename (e.g. DoorCam-2016-12-4_1030.mp4)

The results:
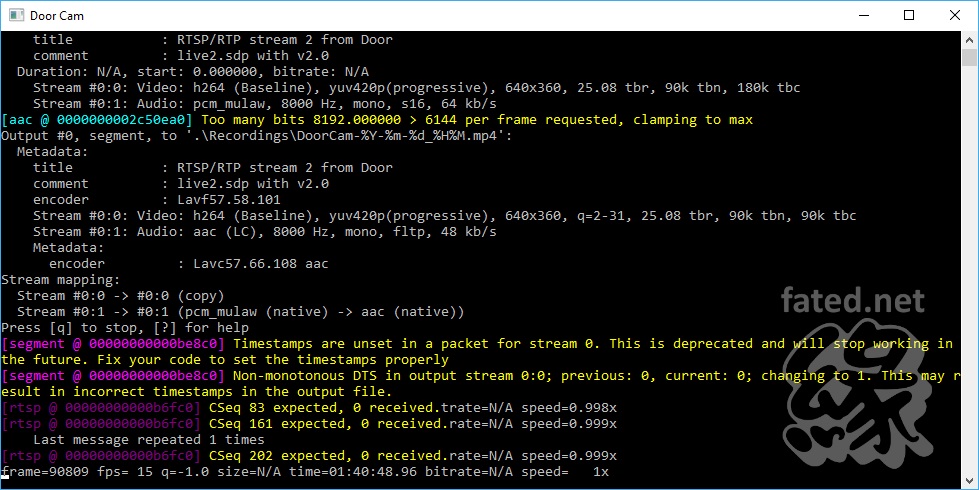
door-cam
Don’t worry about the errors. It happens a lot with live streaming devices such as an IP Camera
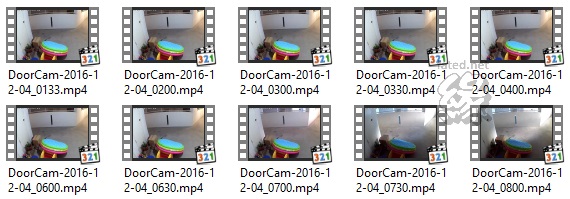
cam_pic

And of course, if you mapped your NAS to your operating system, FFmpeg can dump the files there.

That’s it for now!